Install /e/OS on Mediatek devices
This guide will help you install /e/OS on officially supported devices based on the Mediatek platform.
Requirements
- A supported device based on Mediatek. Check if your device is officially supported.
- A host machine (Linux or Windows).
- A data cable to connect your device to the host machine. A charging-only cable won’t work.
Downloads
- SPFlashTool
Windows: SP_Flash_Tool_v5.2316_WinLinux: SP_Flash_Tool_v5.2228_Linux
We can confirm that the above-linked versions of SPFlashTool work as intended. Using the latest versions is neither encouraged nor discouraged.
Set up the host machine (Linux or Windows)
- Download SPFlashTool on the host machine.
- Unzip the downloaded file.
- Navigate to the unzipped folder.
- Launch SPFlashTool by running or executing the
flash_toolfile. - Enable
Auto Rebootin SPFlashTool by navigating toOptions -> Download -> Auto Reboot after Download.
Steps to flash /e/OS
Step 1: Download the Latest Firmware
-
Find the codename for your device by searching your device’s brand and model in our Smartphone Selector. For example, the codename for Gigaset GS290 smartphone is
GS290and the codename for Teracube 2e smartphone isemerald -
Download the latest firmware package for your device by appending the codename to this link - https://images.ecloud.global/stable/. For example, The firmware download link for Teracube 2e (
emerald) would be - https://images.ecloud.global/stable/emerald. -
Unzip the downloaded firmware.
Step 2: Configure SPFlashTool
-
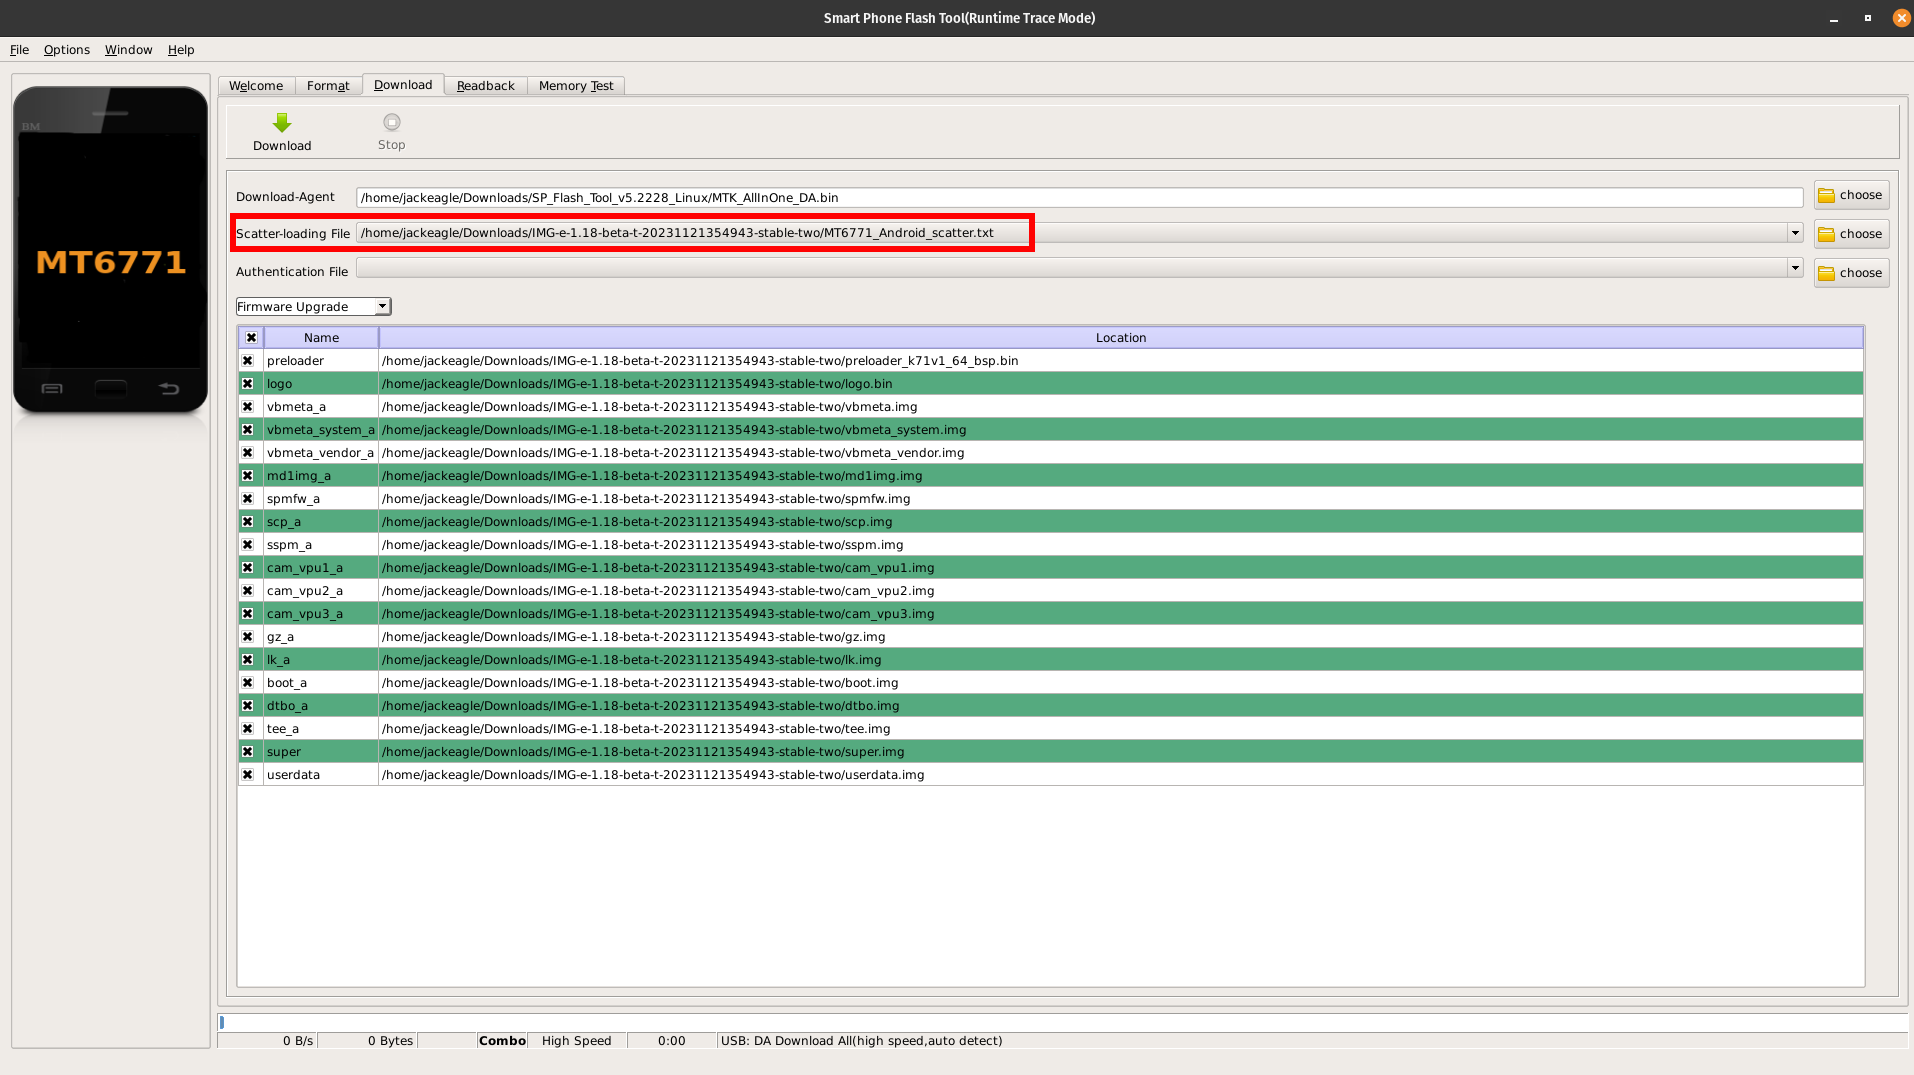
In SPFlashTool, choose the scatter file (
*_Android_scatter.txt) from the firmware directory unzipped in the previous step. See the screenshot below for reference.
-
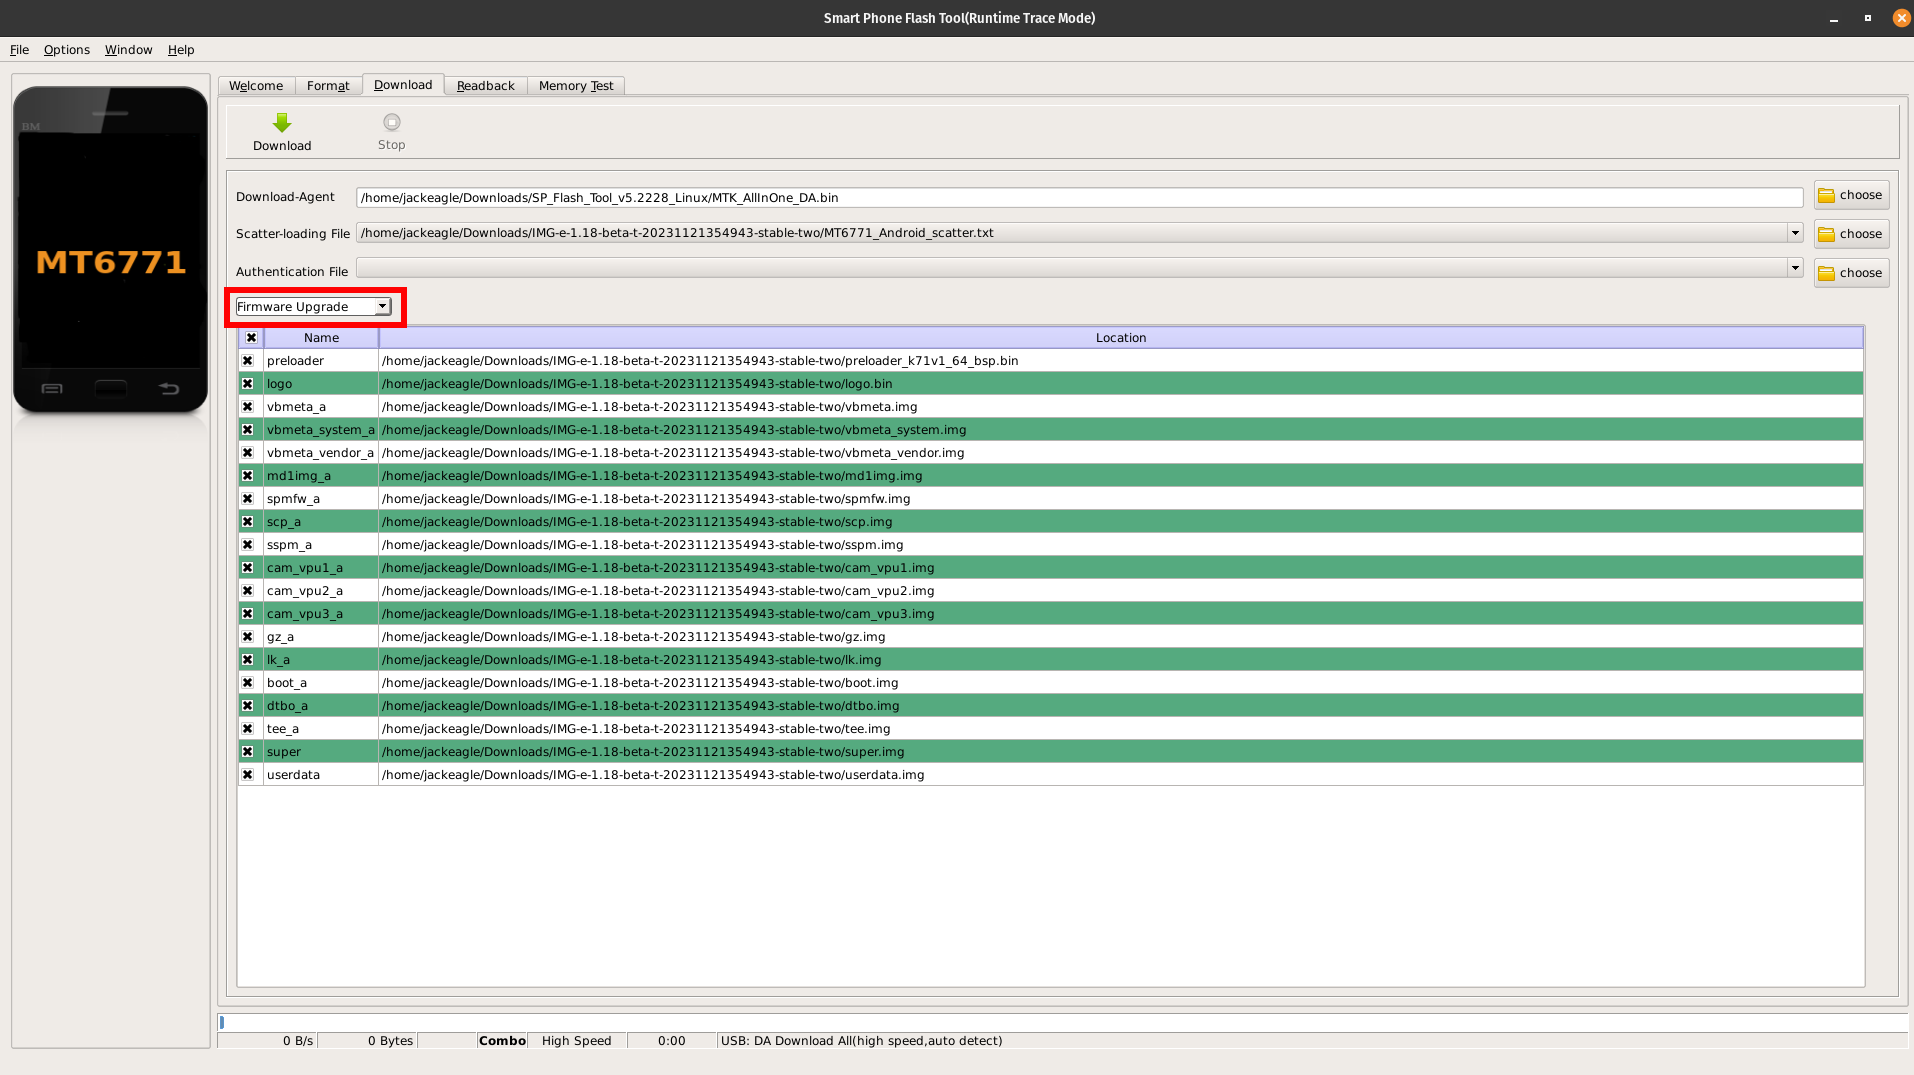
Set SPFlashTool’s mode to
Firmware Upgrade. This mode resets verity, flashes the necessary images, and re-locks the device. See the screenshot below for reference.
Step 3: Flash the Firmware
-
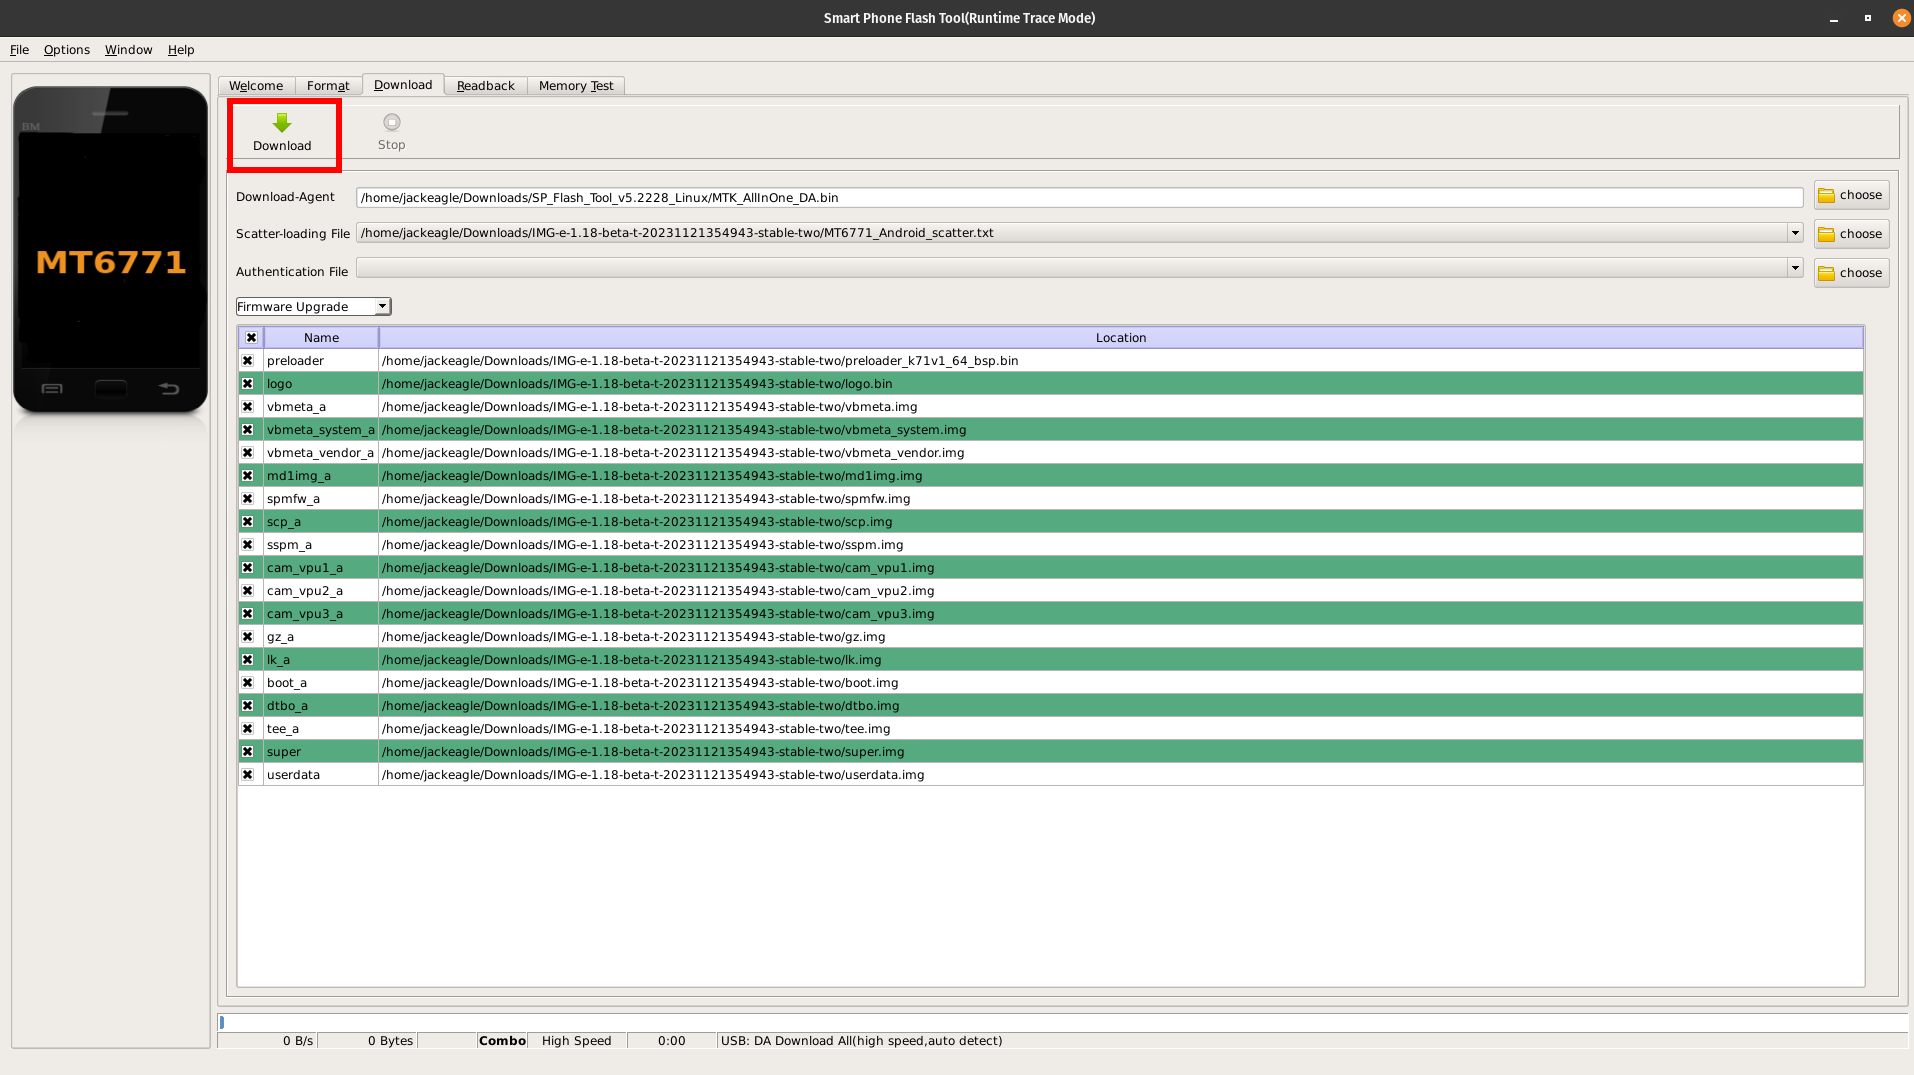
Start the flashing process by clicking
Downloadin SPFlashTool.
-
Power off the device and connect it to the host machine using a cable that supports data transfer.
Tip: Use a USB3 port to avoid detection issues. -
The flashing process should start automatically once it detects the device. This process may take several minutes to finish, please be patient.
-
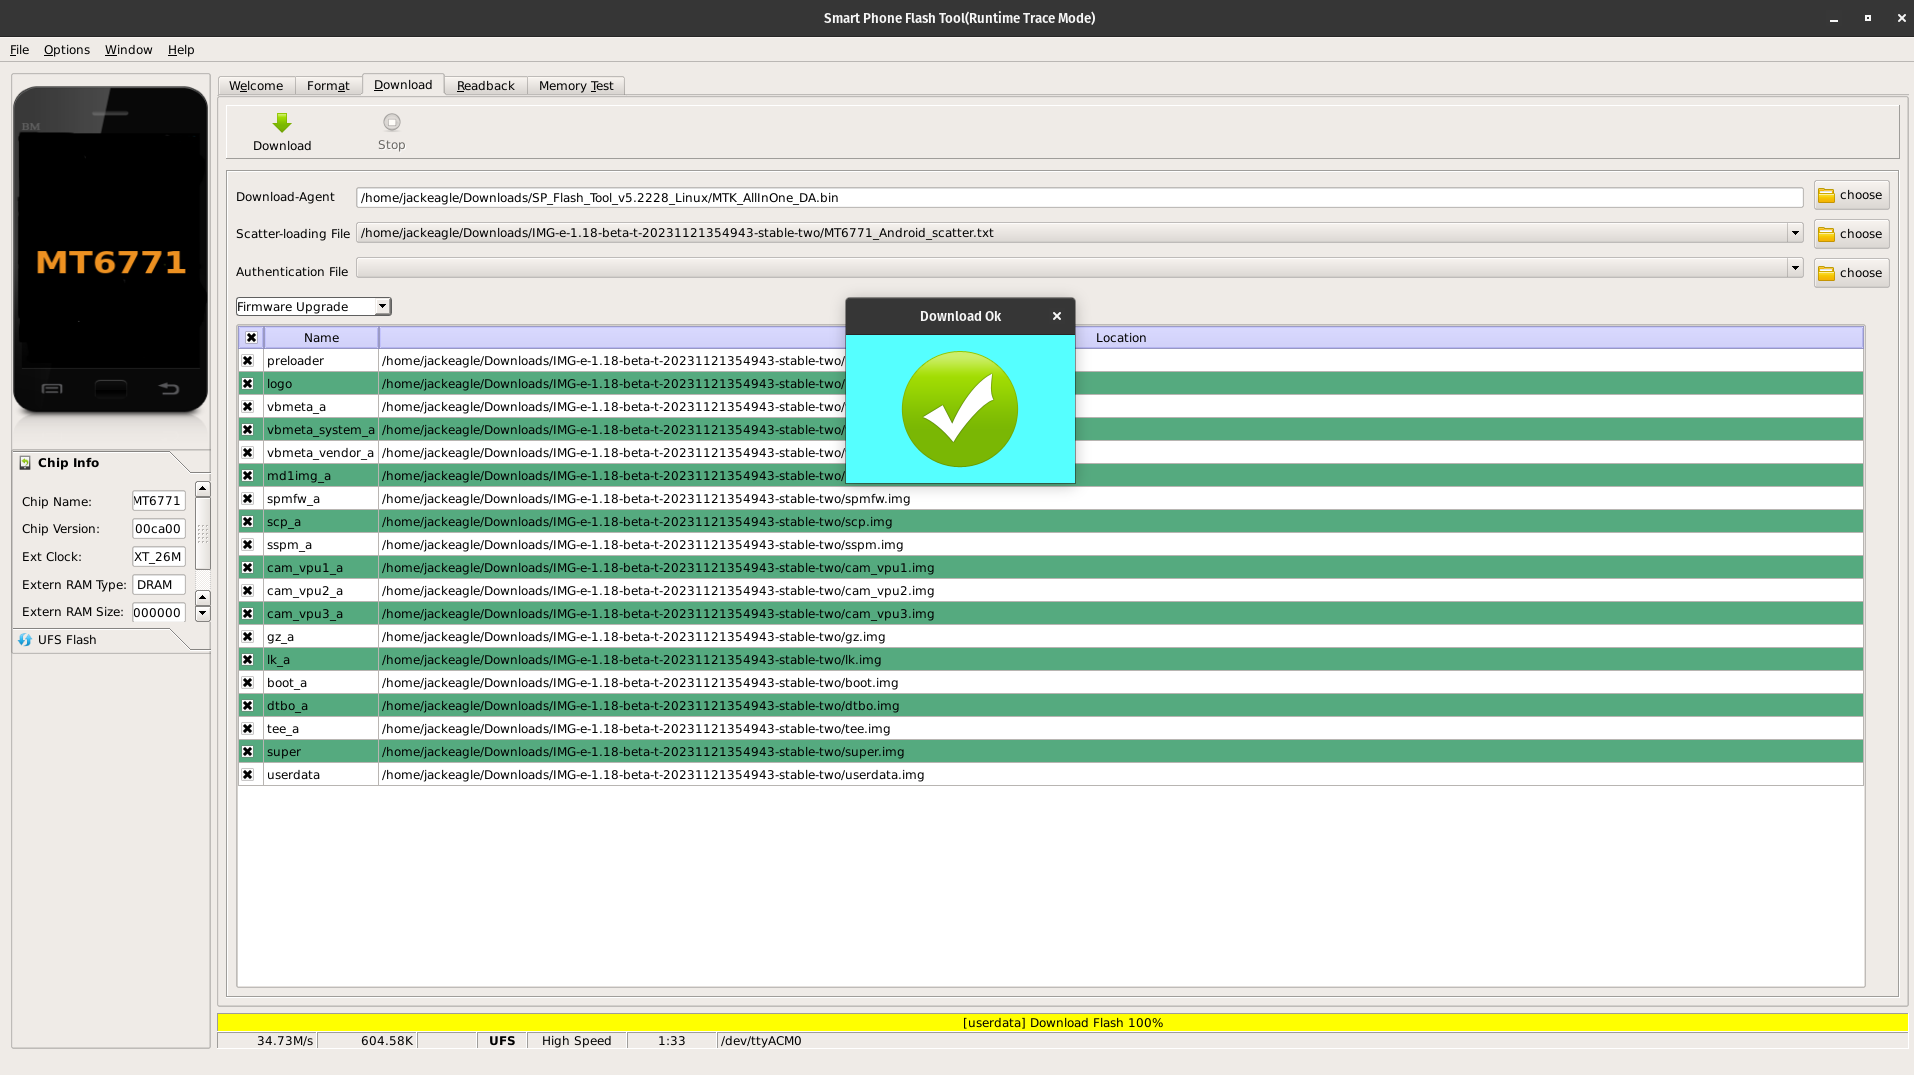
You’ll see a big green tick in SPFlashTool once the process is complete, and the device should reboot automatically. At this point, it’s safe to unplug the device from the host machine.

Step 4: Verify the Installation
- Automatic Reboot: The device should reboot automatically after the flashing process.
- Welcome Screen: The device may take a few extra minutes to boot after a flash. Please be patient, and eventually you should see the /e/OS welcome screen.
Step 5: Enjoy!
Congratulations! Your Mediatek device is now running /e/OS. :tada:
